Walkthrough · 01
Recover after power loss
Pick up exactly where the printer left off
Lost power 6 hours into an 8-hour ABS print? 3DISM remembers where the toolhead was, what temperatures the heaters were at, and the exact line of G-code that was running. Power the printer back on, open the <strong>More</strong> menu, tap <strong>Resume Print</strong>, review what's there, and continue from where it stopped. Most jobs survive with one cosmetic line on the resume layer.
Switch on and open the More menu
After power returns, the printer boots into the normal home screen. Every print's state is auto-saved to an on-board EEPROM chip during the print, so the recovery data is already loaded by the time the screen lights up.
From the home screen tap More to open the secondary-actions menu where the Resume Print tile lives.
Tip. The recovery state survives any kind of power cut — wall socket pulled, breaker tripped, brownout. It's written to a non-volatile EEPROM chip on every layer change, so the worst-case loss is a partial layer.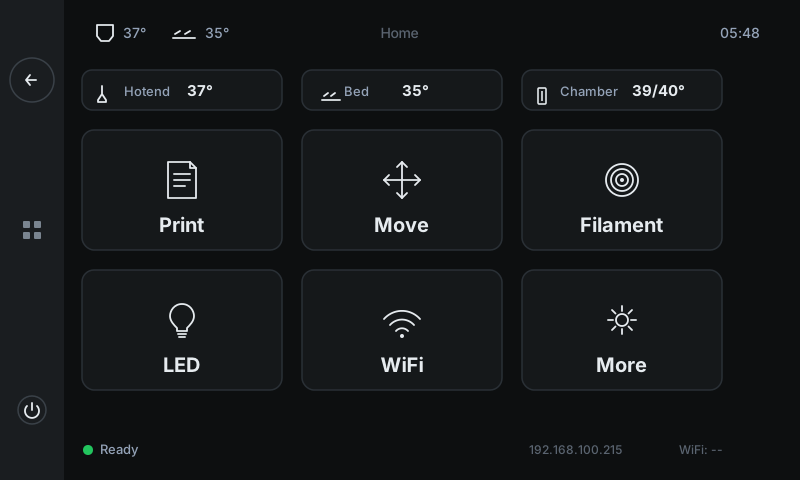 1
1More — Tap to open the secondary menu. Resume Print, Bed Mesh, Input Shaper, and other less-frequent controls live there.
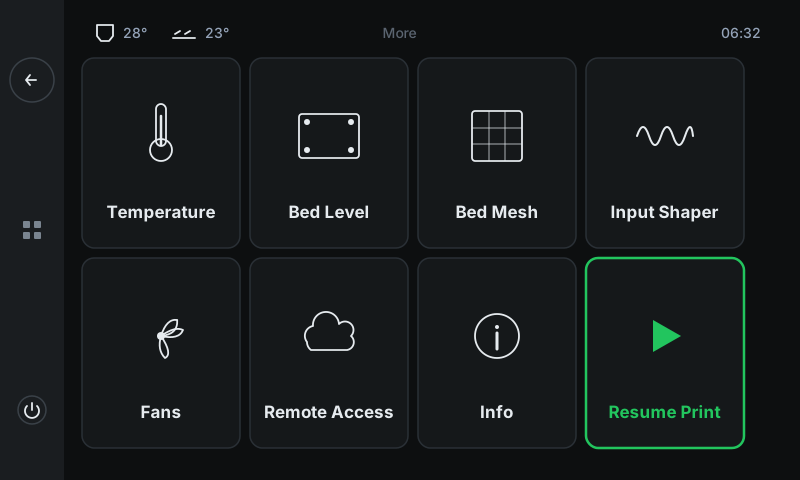
Tap the green-bordered Resume Print tile
The More menu has eight tiles in a 4 × 2 grid. Seven are navigation cards with the normal grey border. The eighth — Resume Print — is always highlighted with a green border because it's a meaningful action, not just navigation.
Tap it. The Resume Print tile is always there — whether or not there's a print to recover. You'll find out which case you're in on the next screen.
 12
12Resume Print tile — Always sits in the bottom-right of More with a green border to stand out from the navigation tiles. Tap to open the recovery panel.
Other tiles for comparison — The other seven tiles have a normal grey border — they navigate to settings / status panels. Only Resume Print gets the green treatment.
Review the recovery panel
The Resume Print panel tells you immediately whether there's a recoverable print waiting. The badge at the top is your signal:
• Recovery available (green) — the EEPROM has a complete print state to restore. The thumbnail card shows you the file. Both action buttons below are enabled.
• No data (grey) — nothing to recover. The previous print finished cleanly, was cancelled, or the EEPROM was already cleared. Both buttons are disabled. Tap Back and carry on.
When you see the green badge, eyeball the thumbnail to confirm it's the print you remember running, then pick an action.
Heads up. The Clear data button is destructive — once you tap it, the EEPROM payload is wiped and the print can't be resumed. If you're not sure, leave the panel and come back later.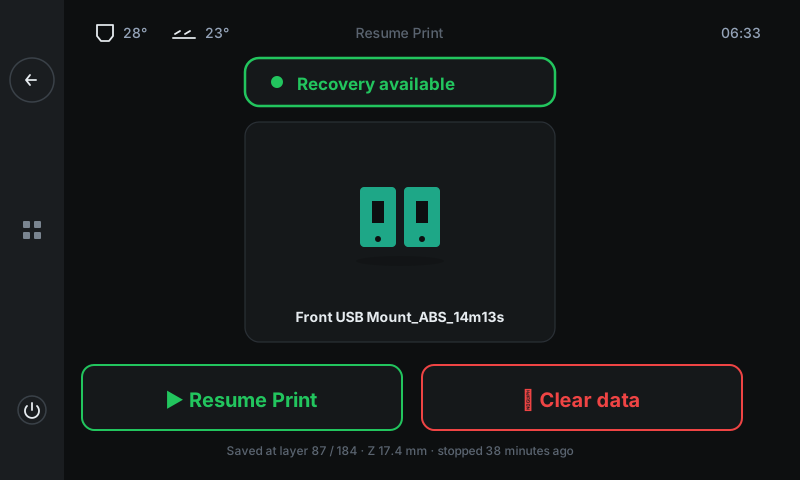 12345
12345Status badge — Confirms the recovery payload was loaded cleanly. Red 'No data' here would mean the EEPROM didn't have anything to restore.
Thumbnail + filename — Slicer-generated preview of the part + the filename. Visually verify this is the job you expect before you tap Resume.
Resume Print — Continues the print. The printer re-heats the hotend and bed to where they were, drives Z down to the saved height + a small safety lift, then picks up at the saved G-code line.
Clear data — Discards the saved state without resuming. Use this if you don't want to resume — for example you decided to re-slice the file or print a different colour.
Recovery details — Layer + Z + how long ago the print stopped — useful sanity check that the recovery point matches what you remember happening.
Tap Resume Print and watch it pick up
After you tap Resume Print the printer takes about 90 seconds to get going again, then continues from where it stopped:
• Re-heat. Both heaters ramp up to the saved temperatures. You'll watch the values climb on the Job Status panel.
• Re-home. Toolhead does a careful homing cycle, then moves to the saved XY position with Z lifted a few millimetres for safety.
• Re-prime. Extrudes a tiny purge to wake up the nozzle (so the resume line doesn't start with an air gap).
• Continue. Drops Z to the saved height and resumes the G-code stream from the saved line.
You'll see a thin cosmetic line on the layer where the resume happened. The print finishes normally from there.
Tip. Power-loss recovery works best on ABS / ASA / PC prints inside a heated enclosure where the part stays warm. PLA prints often warp during a long power cut — recovery still works mechanically, but the part may have moved on the bed.